A good fit is a sequence of small adjustments.
A cross-back apron can look complicated when the straps arrive folded together. Once you separate the apron body from the strap arrangement, the fitting process becomes easier: decide where the bib belongs, make the shoulder straps sit evenly, secure the waist, then check how the whole apron moves. Work in that order before adding anything to the pockets. An overloaded pocket can disguise an otherwise simple adjustment problem.
Start in the clothes you expect to wear under the apron. A loose sweater takes up different space from a light shirt, and a jacket can change where the straps rest. You do not need special equipment for the first fitting. A mirror, a tape measure and an apron you already find comfortable are useful. If you have someone available to check the straps from behind, that can save a little turning and guessing.
Our classic canvas, 12 oz water-repellent and tool aprons all use a cross-back arrangement. Their fabric and storage differ, so use the selected product's photographs when identifying clips, ties and attachment points. Do not assume that every apron sold as cross-back threads in exactly the same way. Follow any instructions supplied with the garment when they differ from a general fitting routine.
The aim is a balanced apron that stays where you want it during ordinary movements. This guide explains how to compare measurements, adjust the straps and diagnose a few common fit problems. It cannot promise a particular fit from a clothing size alone. If you are still choosing a construction, read our canvas apron guide first, then return here with the selected model in mind.
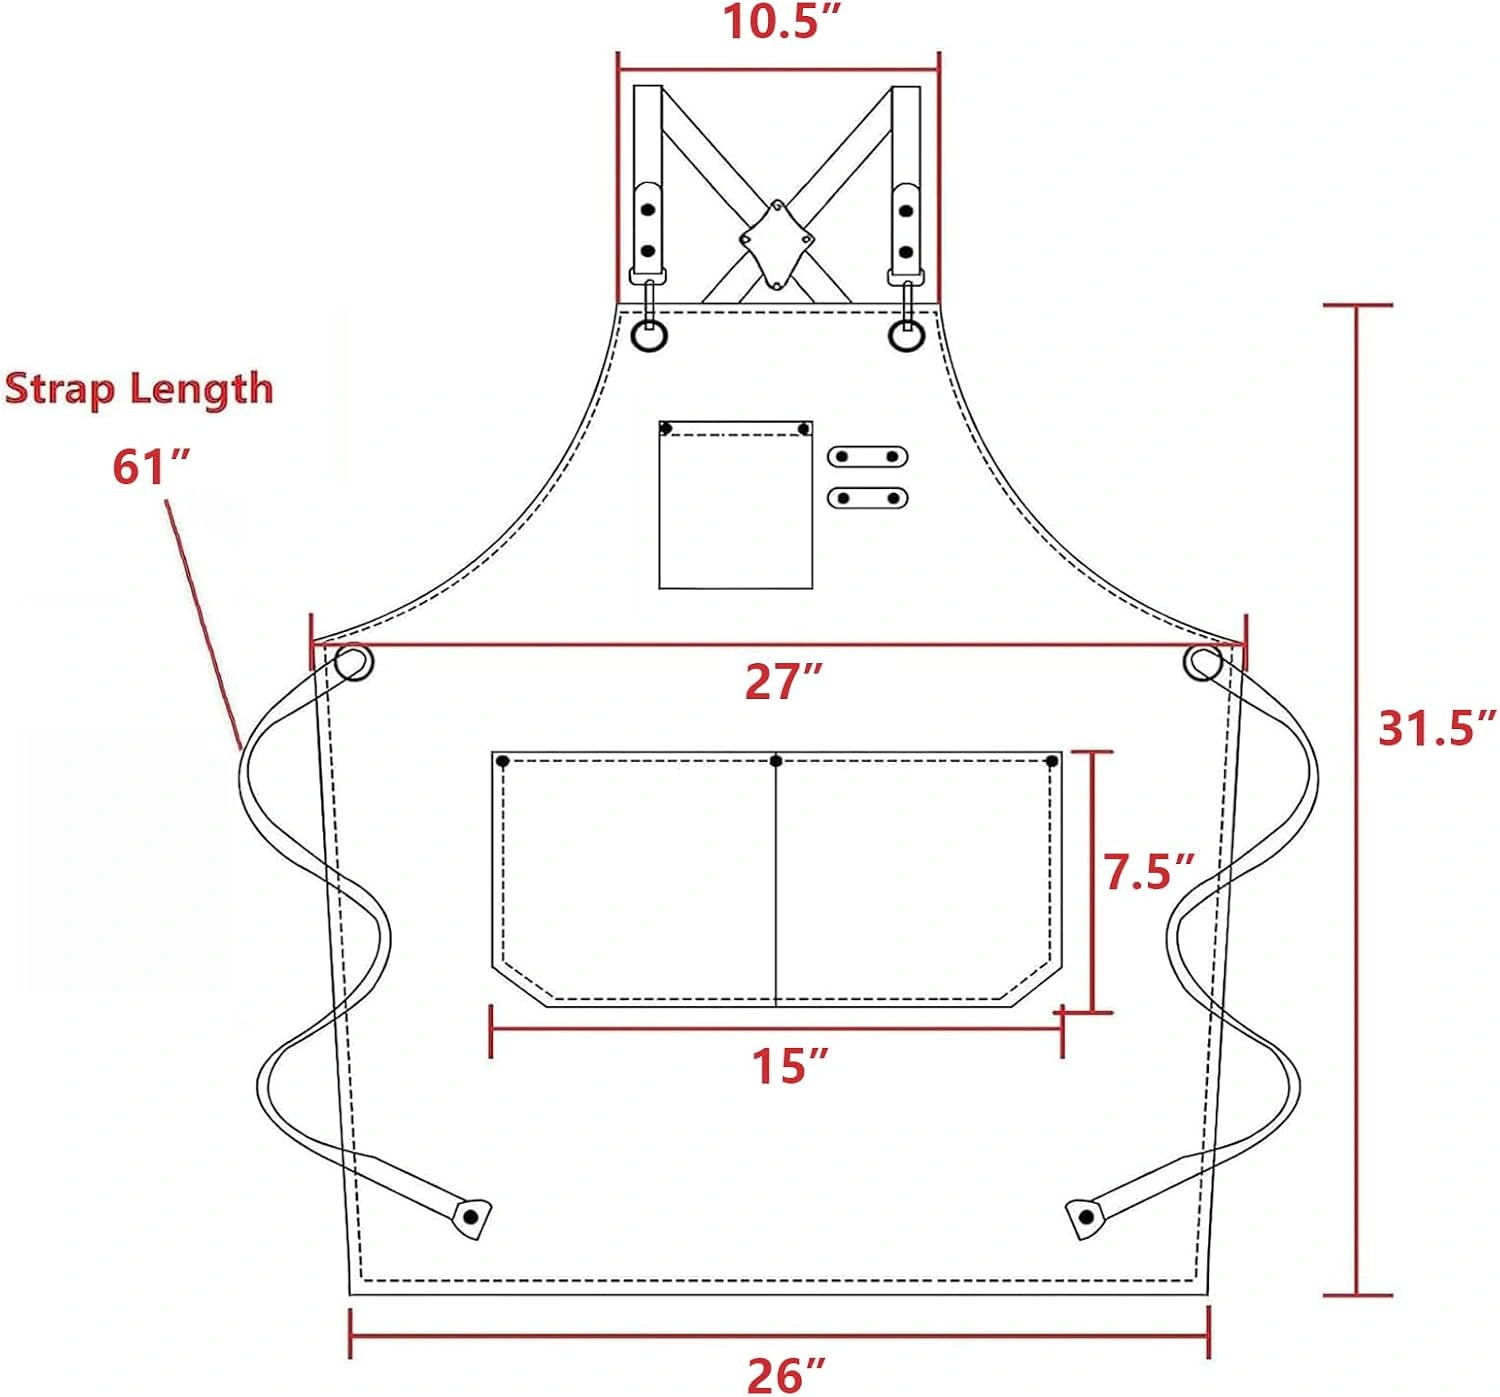
Read the dimensions as measurements of fabric.
The classic and 12 oz AFUN diagrams show a body length of 31.5 inches, an upper width of 27 inches and a hem width of 26 inches. Those measurements describe the apron lying flat. They do not describe the wearer's waist, chest or height. In particular, a 27-inch panel is not a 27-inch waist size: an apron covers part of the body and uses ties or straps to complete the fit.
Length begins at the top of the bib, rather than at your shoulder. Raising the bib changes where the hem lands; lowering it changes both coverage and pocket height. This is why two people of similar height can prefer different adjustments. Compare the top edge and hem together. A photograph showing an apron ending at one person's knee does not tell you where it will end on your body.
Width also needs a named measurement point. An apron can taper between the upper waist and hem, and a broad-looking bib may have a narrower top edge. Use the diagram's labels rather than assuming the widest visible point is the stated width. If you are comparing brands, check whether each maker measures the same part. Numbers placed side by side are useful only when their meaning is clear.
For the AFUN tool line, the published size guidance is M–XXL. Treat that as a starting range rather than a set of exact garment dimensions. We do not transfer the classic apron diagram to the tool model. Open the grey tool apron or your preferred color, inspect its own photographs and check the selected option before deciding. A more detailed question can be directed through the seller-contact option in the purchase tab.
| Measurement | What to compare | What it cannot establish |
|---|---|---|
| Bib-to-hem length | The same flat length on a comfortable apron | Your final hem position without setting the bib height |
| Upper body width | The labeled width at the upper waist | The wearer's waist circumference |
| Hem width | Width along the bottom edge | Room during movement without a try-on |
| Size range | The selected model's stated fit guidance | A guaranteed fit for every body in that clothing range |
Make a reference from an apron you already like.
Lay a familiar apron on a flat surface with the body smoothed gently. Do not stretch the fabric to make a larger number. Measure from the center of the top bib edge to the bottom hem, then record the width at the upper waist and bottom edge. Add a quick sketch showing the measurement points. The sketch prevents confusion when you compare your notes with a different manufacturer's diagram later.
Next, put that familiar apron on and notice where those dimensions land. Check the bib height, the amount of side coverage and the distance from the lower pockets to your natural reach. Mark what you like in words: “pockets easy to reach while standing” is more useful than simply “fits.” If something bothers you, record that too. Your reference should describe a preferred fit, not merely preserve the dimensions of the last apron you bought.
Without a reference apron, use a flexible tape measure over your normal clothes to picture the vertical coverage. Hold its starting point where you would like the bib top and follow the stated length downward. This gives a rough visual guide, not a complete fit test. The shape of the fabric, the strap arrangement and your movement still matter. Avoid turning that rough check into a precise promise about wraparound coverage.
When shopping for another person, their favorite apron is a better reference than your own. A shirt size or height may help start a conversation, but it leaves out torso proportions and preferred coverage. If the gift must remain a surprise, keep the order's return conditions in mind and allow the recipient to try the garment before washing or altering it. Fit is easiest to judge with the actual apron and its original label available.
Untwist the straps before adjusting them.
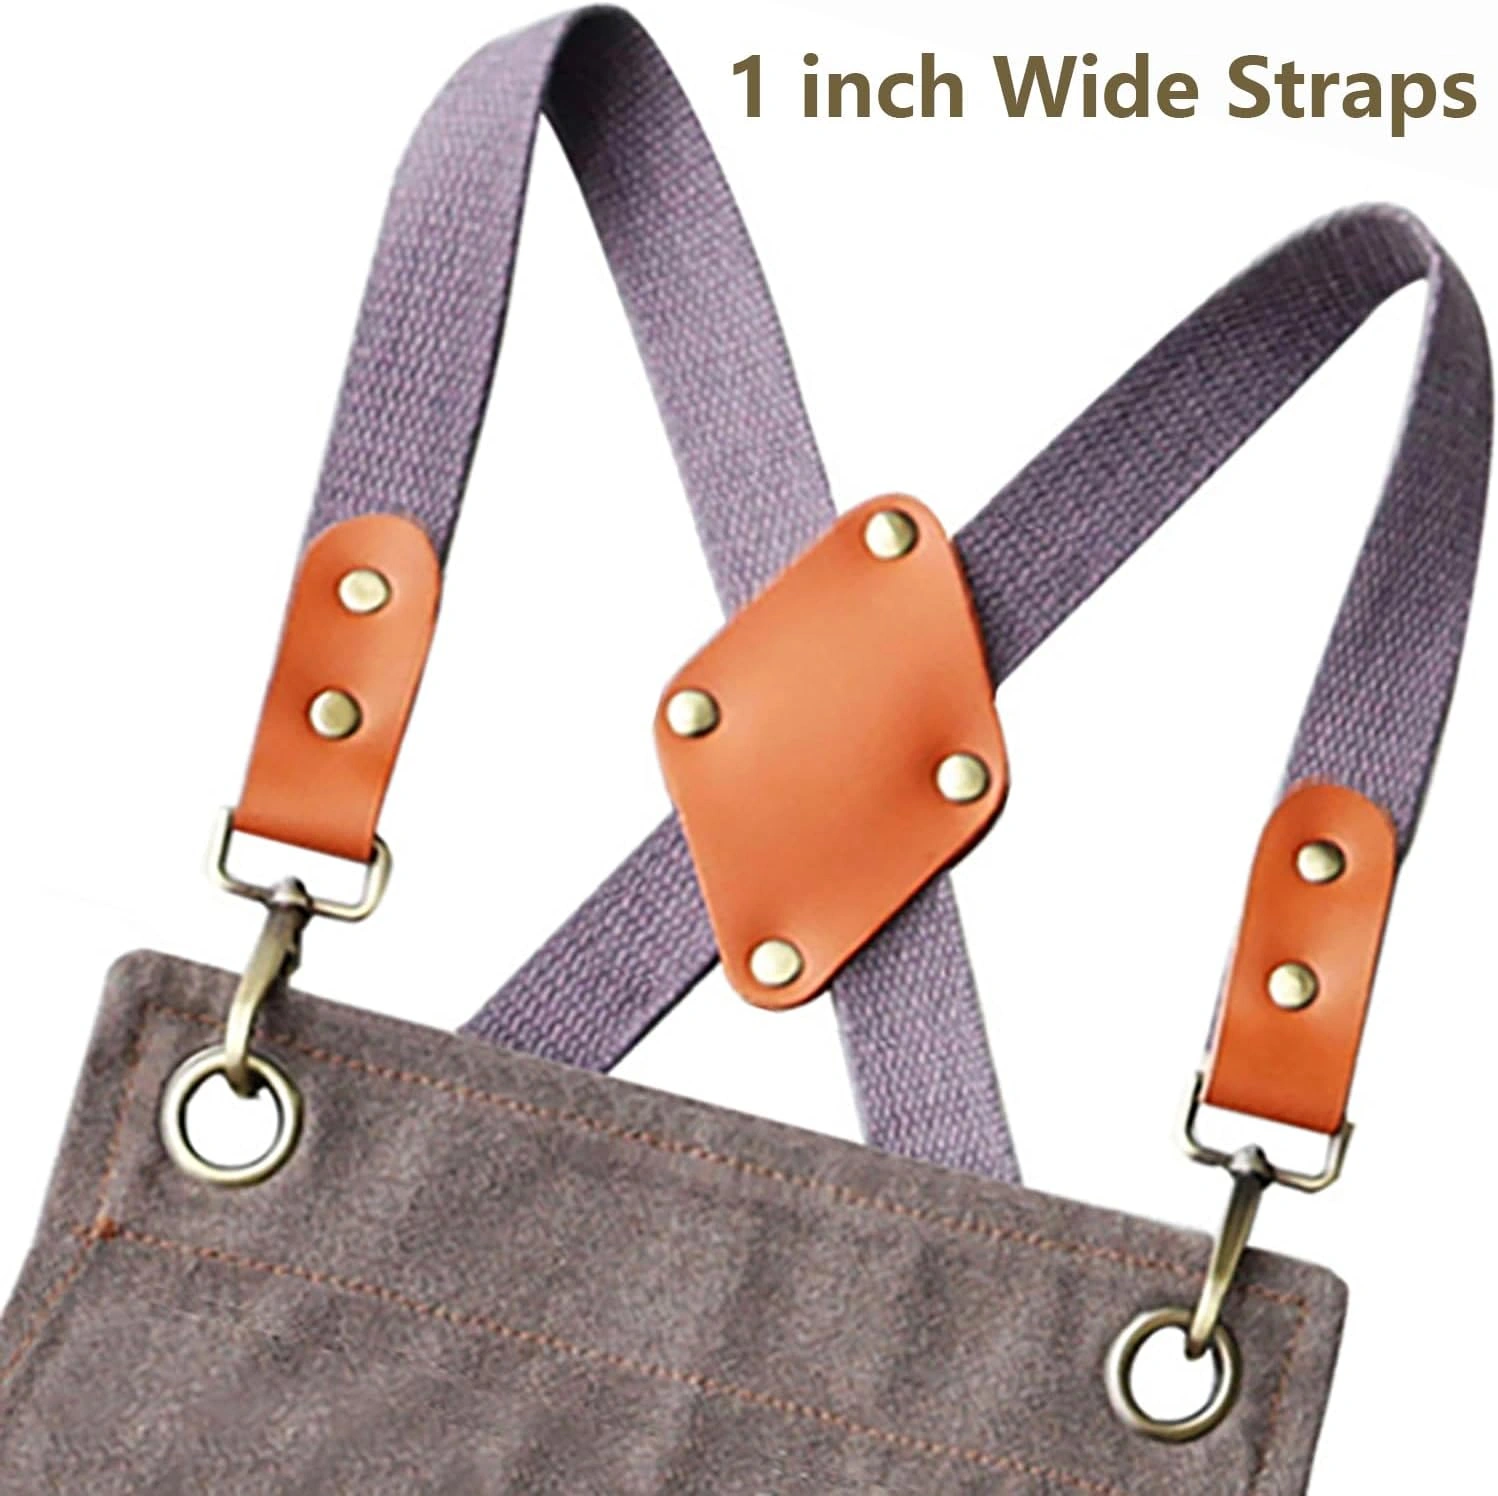
Spread the apron out so you can identify the front, back, top corners and waist area. Follow each strap with your hand from its attachment point to its free end or connector. This is often quicker than pulling on whichever end happens to be visible. If the model has detachable hardware, compare it with the product photographs and supplied instructions before unclipping anything unnecessarily.
Put the straps over your shoulders with the bib facing forward. Check that each strap lies flat where it rests on your shoulder and crosses behind your body as intended. A twist can make one side feel narrower or pull differently, even when both sides appear to be adjusted to the same length. Smooth the strap first; changing the length does not remove a twist.
“A full-coverage apron with adjustable straps that cross comfortably over your back”
Hedley & Bennett, Crossback Apron product description
That description names the basic arrangement shared by cross-back designs. It is a description of the cited brand's product, not a fit guarantee for another apron. The useful thing to check on your own garment is the path of each strap: over the shoulder, across the back and through its intended attachment or adjustment point. Different closures can achieve that arrangement in different ways.
If the apron feels difficult to put on, take it off and trace the straps again on a table. Avoid shortening everything while the straps are tangled. A quick reference photo of the correctly arranged back can be useful after washing or when another person adjusts the apron. Once the path is clear, move on to bib height without loading the pockets.
Set the bib height, then balance the shoulders.
Hold the bib at the height where you want the front coverage to begin. It should sit in a position you can maintain comfortably, without forcing your shoulders upward or pulling the top edge close to your throat. Use the garment's intended adjusters or ties to change the strap length gradually. Keep the panel centered as you work so that you do not mistake a sideways pull for a length problem.
Check one side, then the other. Small adjustments make their effects easier to understand. If you shorten both sides substantially at once, you may raise the bib correctly but move the lower pockets higher than you prefer. Look at the whole front panel after each change. Bib height, hem position and pocket reach are connected; it is worth finding a compromise that serves the task you actually do.
Now let your arms hang naturally and look in a mirror. The top edge should not be visibly dragged toward one shoulder. If it is, check for a twisted strap, unequal adjustment or an attachment that is not seated correctly. Do not try to compensate by tying the waist harder on the opposite side. Correct the cause at the shoulders before using the waist ties to hold the body in place.
Finally, raise your hands as if reaching toward a shelf within your normal range. The fabric may move, but you should not need to shrug or hold an unusual posture to keep the apron centered. Bring your arms down and check whether the panel settles back where you put it. If the fit still feels restrictive, loosen the relevant adjustment and repeat the check before continuing.
Secure the waist without changing the whole fit.
With the bib and shoulder straps set, bring the waist ties into a comfortable position using the route intended for the model. Tie them securely enough to keep the panel stable, without pulling the fabric tightly around you. Check that any clips are fully seated. Keep loose ends contained and clear of your working area, especially when you are near heat or moving equipment.
Some people like to tie an apron at the back; others prefer bringing the ties around to the front. The available length depends on the model, body shape, clothing layers and the earlier adjustments. Long-looking straps in a photograph do not guarantee a front knot for every wearer. Use a secure arrangement that fits comfortably rather than forcing a particular position at the expense of coverage.
Pay attention to where a knot lands relative to the task. A large front knot may be noticeable when you lean against a counter, while a back knot may be noticeable when you sit against a chair. Try those ordinary positions before cooking or beginning a project. You can often improve the experience by changing the knot position within the garment's intended setup, without changing the bib height again.
A final waist check should include a relaxed breath and an easy turn to each side. If the panel bunches dramatically, work backward through the adjustment sequence instead of tightening it further. If ties do not reach a secure position, the fit is not solved by leaving them barely fastened. Reassess the selected option and use the order-help route if the apron cannot be adjusted appropriately for you.
Run a movement check before adding tools.
Stand at a clear counter or table and reach forward as you would during the task. Notice whether the bib pulls away, the shoulder straps shift or the waist feels restrictive. Return to your starting position between movements. A short, deliberate check helps separate a strap problem from the simple fact that fabric moves with your body.
Next, bend enough to open a low drawer, then turn to each side. Sit on the chair or stool you normally use if your work involves seated periods. Watch the lower edge and pocket openings. A hem that feels fine while standing may bunch when seated, and a pocket that is easy to reach upright may be awkward at a table. Your usual working position deserves more attention than the pose used in a product photograph.
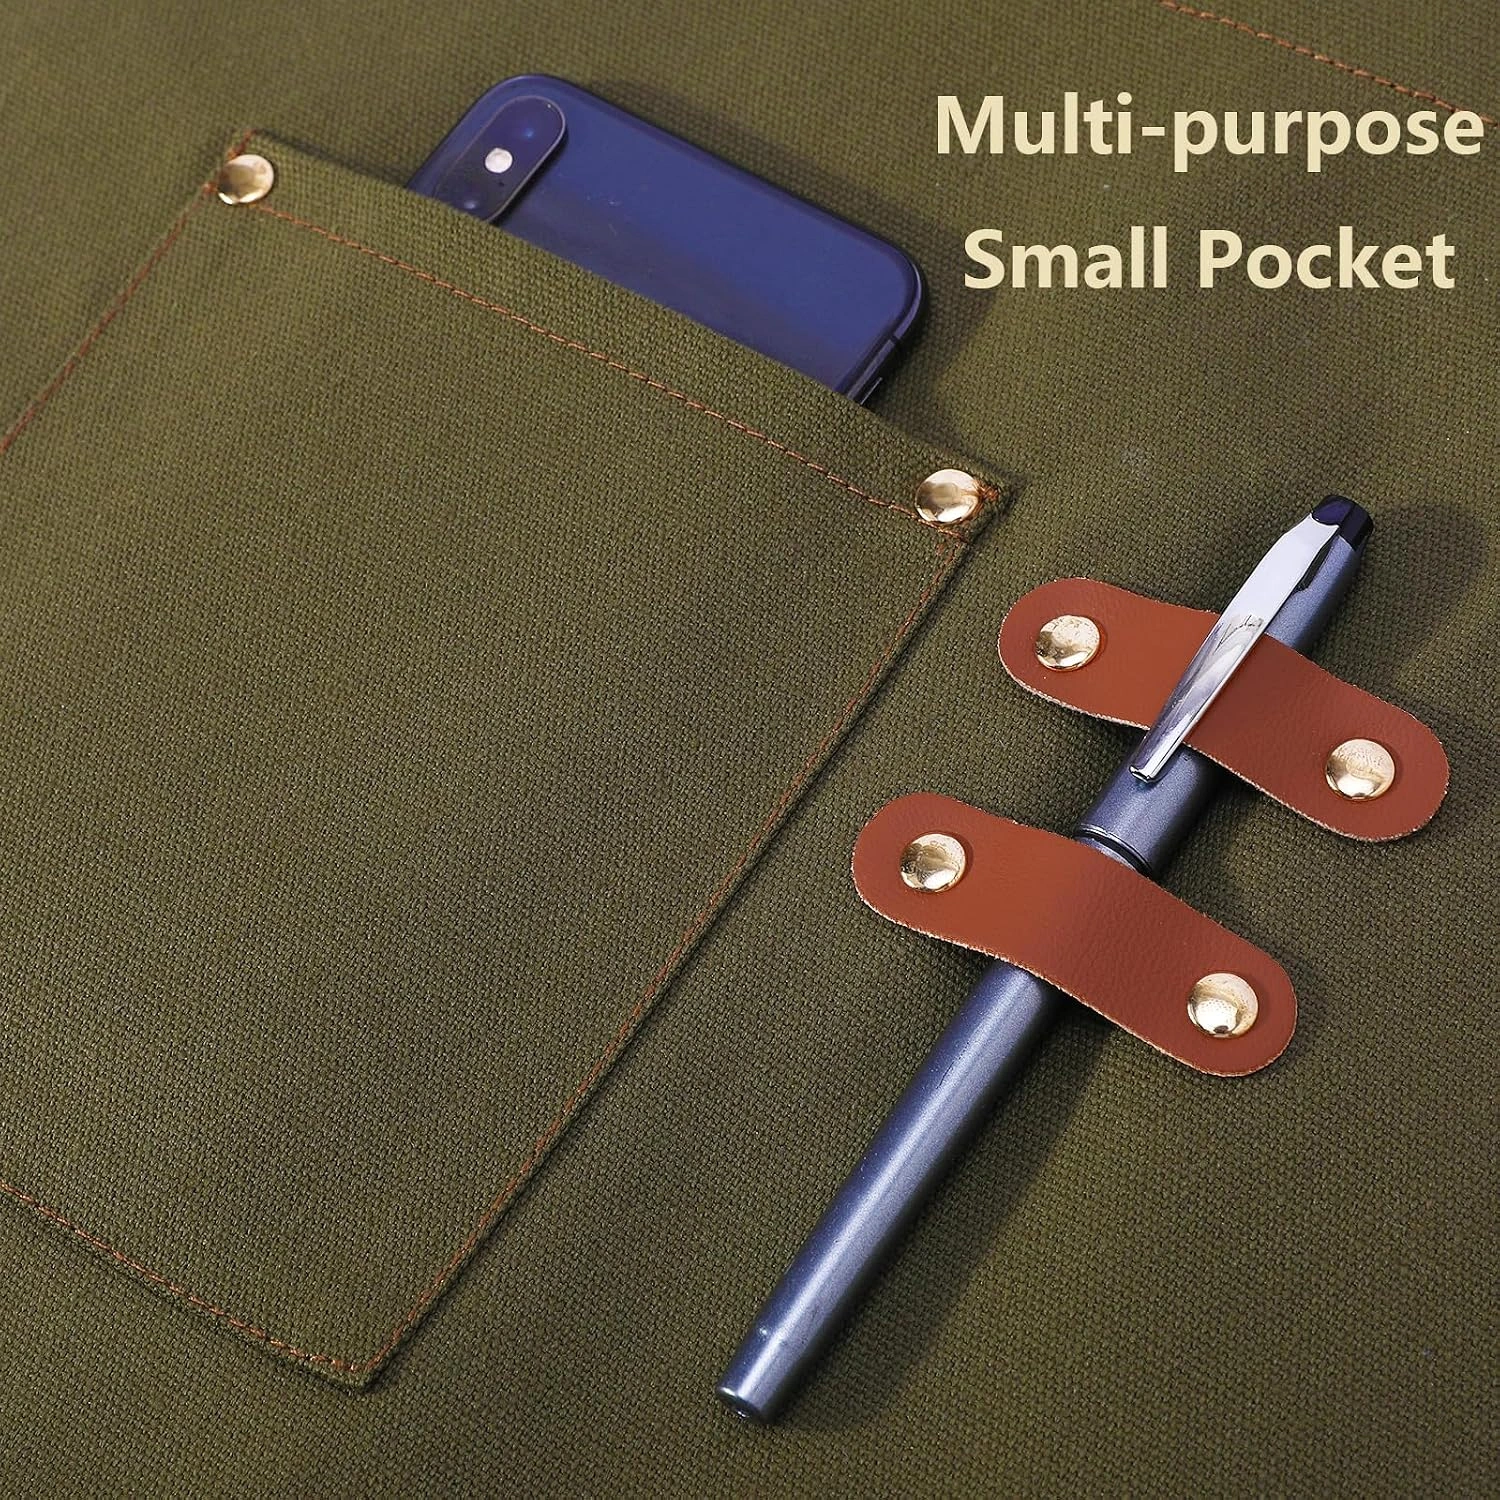
After the empty-apron check, add just the few objects you intend to carry. Repeat the movements with a light load. If the bib tilts now, move or remove the item pulling it off center. Tightening the opposite strap to compensate can create a new imbalance once the item is taken out. A practical pocket arrangement should remain comfortable as you use and return the contents.
For food preparation, keep the setup simple with the suggestions in our kitchen and grilling guide. For small hand tools, the garden and studio guide explains how to choose what travels with you. Ordinary canvas is not protective equipment for hazardous tasks. Follow the requirements of the equipment and activity rather than treating a good fit as a safety rating.
| Movement | Watch for | First thing to reconsider |
|---|---|---|
| Reach forward | A bib that pulls sharply or falls away | Shoulder length and bib height |
| Turn sideways | A panel dragged toward one side | Twisted straps or unequal adjustment |
| Sit down | Bunched fabric or uncomfortable pocket contents | Hem position and the items carried |
| Add a light pocket load | One shoulder taking a stronger pull | Pocket placement before strap tension |
Work backward from the part that bothers you.
If one strap repeatedly slides, inspect its full path before shortening it. A twist, an uneven bib or an incorrectly seated attachment can affect how it rests. Check the selected model's photographs again and make sure the two sides are arranged as intended. If everything is correctly routed, try a small adjustment and repeat the reach test. Stop if the change merely moves the discomfort elsewhere.
If the lower pockets feel too far away, check where you set the bib. Raising the panel can change pocket height, but it also raises the hem and top edge. Do not keep raising it after those positions become uncomfortable. Pocket placement is part of a garment's cut, so adjustment has limits. Choosing a different layout may be more useful than repeatedly trying to make the same panel behave like another style.
If the apron feels stiff, consider the fabric preference separately from fit. A correctly adjusted 16 oz apron will still be the substantial canvas construction you selected. Do not rely on an unverified break-in timetable or try aggressive washing to force a different feel. Follow the care label. If you prefer a lighter construction, compare the grey green 12 oz apron before deciding on another classic color.
If coverage seems insufficient at the sides, recheck the flat width and how the panel sits over your clothes. Tightening the waist cannot add fabric. If the hem position is the concern, compare the stated body length at your chosen bib height. Keep these observations specific when asking a product question: “I need more length below this bib position” is easier to answer than a general request for a larger apron.
Keep a setup you can repeat.
Once the apron feels right, notice the position of its adjusters and how you arranged the ties. A simple reference makes it easier to restore the fit after cleaning or lending it to someone else. If detachable straps come off for care, keep them together with the apron and follow the supplied directions when replacing them. Inspect attachment points while the garment is empty and easy to handle.
Recheck the fit when your clothing layers change or when the task calls for different pocket contents. You do not need to repeat a lengthy fitting routine every time. A quick check for flat straps, secure ties and comfortable reach is usually enough to notice an obvious change. If something feels wrong, return to the empty-apron sequence rather than compensating with more tension.
Use our fit and care checklist for a short reminder, or return to the AFUN style comparison to choose a different construction. The useful outcome is a garment you can put on consistently, adjust without guesswork and wear in the positions your work requires.