Start with the meal you actually make.
A useful kitchen apron fits the way you cook on an ordinary day. Think about the last meal that left you with flour on your shirt, a missing timer or nowhere convenient to put a recipe note. Those small frustrations tell you more about your next apron than a photograph of a perfectly arranged kitchen. You might want a broad front panel, a lighter fabric, or pockets that stay within reach while you move between the counter and the stove.
Before comparing colors, write down your three most frequent cooking jobs. Perhaps you bake bread on weekends, prepare vegetables most evenings and grill when friends visit. Another household might spend more time making coffee, mixing dough with children or cooking several dishes at once. An apron can serve all those routines, but the feature you notice most will change with the task. Let your busiest ordinary task lead the decision.
We offer two straightforward starting points for home cooking: classic 16 oz cotton canvas and 12 oz water-repellent cotton canvas. Both have cross-back straps and three front pockets. The difference is the fabric weight and finish, rather than a promise that one makes you a better cook. Choose the substantial classic if that is the feel you enjoy; consider the lighter line if weight is your first concern.
This guide follows a cooking session from getting dressed to putting the apron away. Use it to decide what belongs on your body, what should stay on the counter, and which details deserve a closer look before ordering. For the broader material and color decisions, our canvas apron buying guide gives you a useful overview.
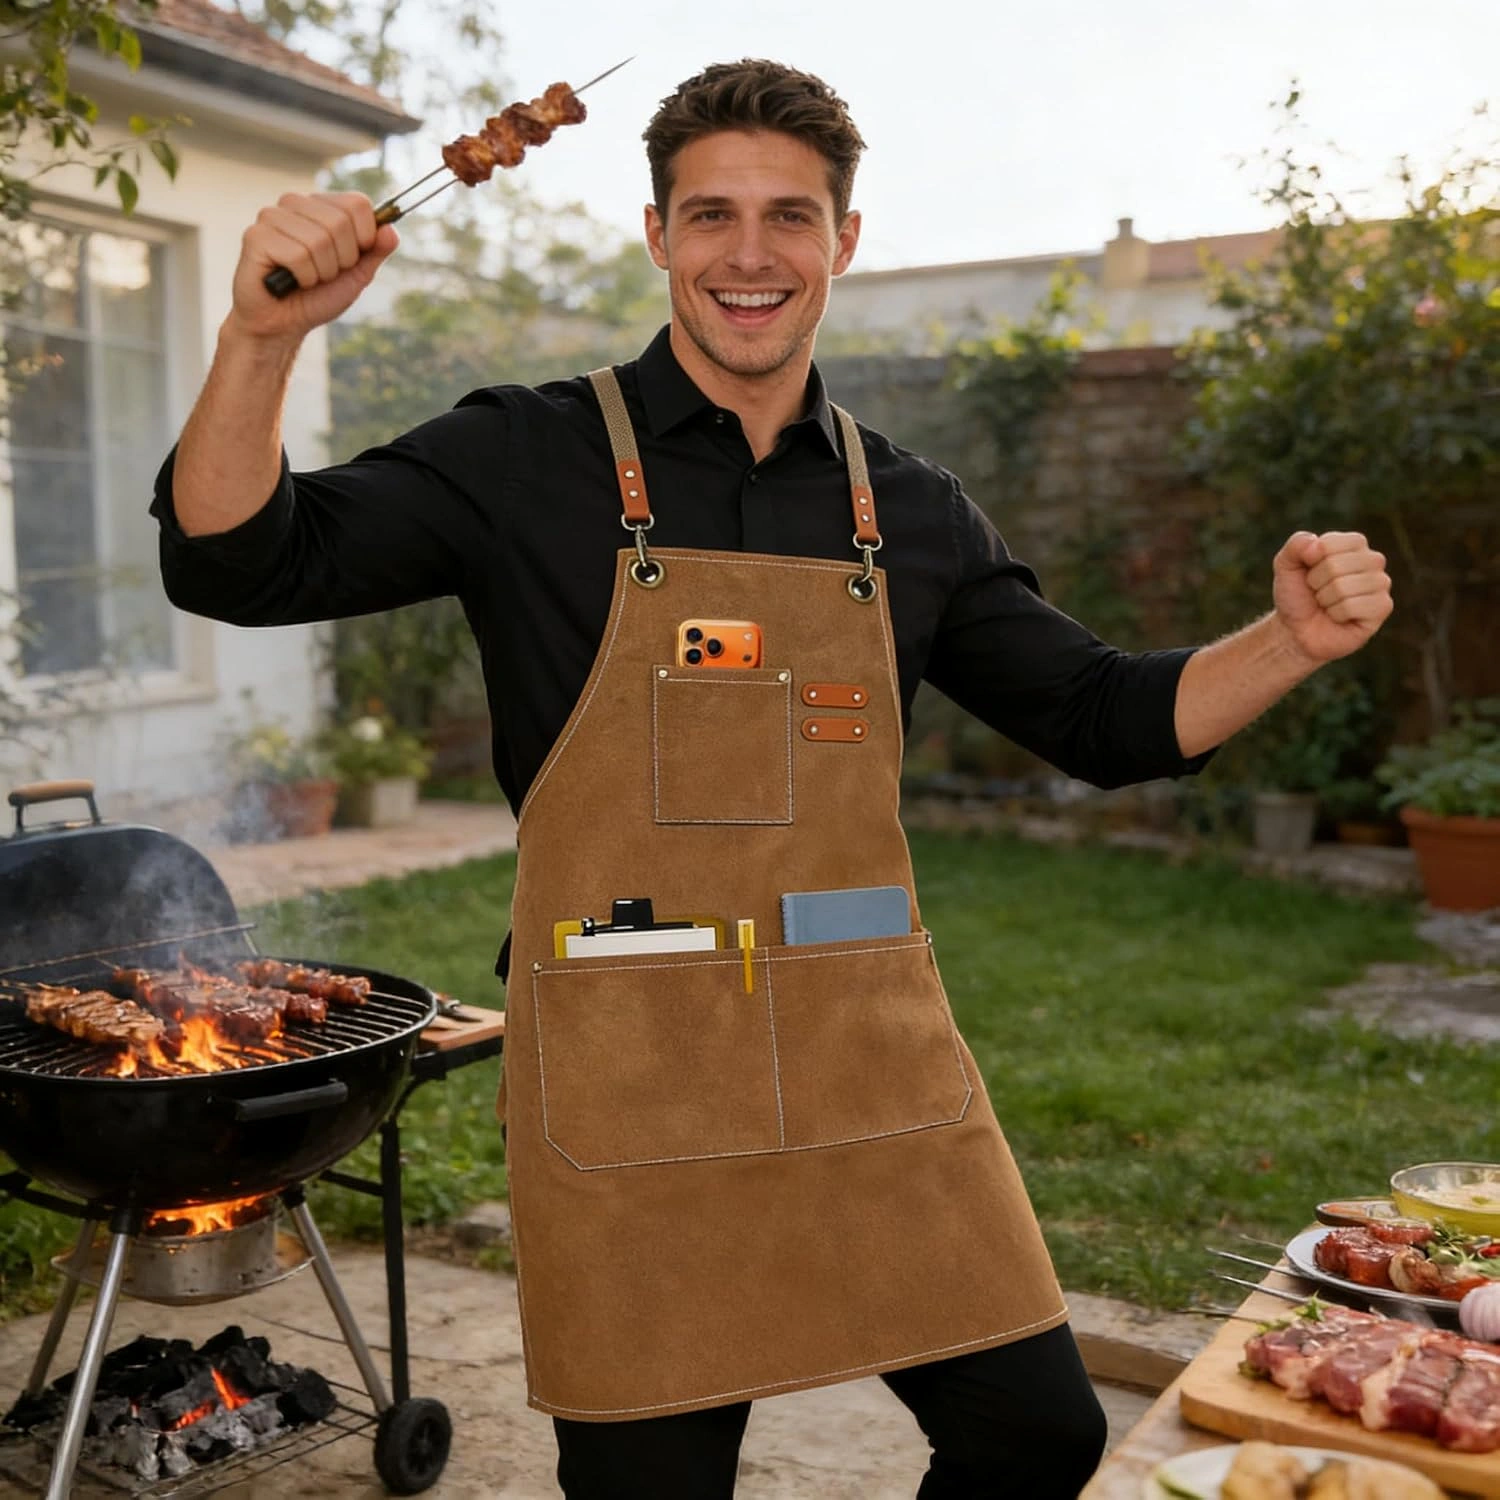
Choose the feel before the color.
Our classic line uses 16 oz cotton canvas; the lighter range uses 12 oz cotton canvas. These figures describe fabric weight, not the finished apron on a kitchen scale. Straps, hardware, dimensions and pockets also contribute to what you carry. The numbers help you compare the two constructions, but they cannot tell you exactly how warm or comfortable either will feel in your kitchen.
A substantial apron can appeal to someone who likes a more structured front panel. It may be less appealing if you already find layered clothing cumbersome. Picture what you normally wear underneath: a light shirt, a long-sleeved top or a thick sweatshirt. Your preference on a cool patio may differ from your preference while kneading dough in a warm room. There is no need to choose one fabric as the universal winner.
The 12 oz range has a water-repellent finish. That detail can be useful around the small splashes of everyday preparation, but it does not make the apron waterproof. It also says nothing about resistance to hot oil or flame. A canvas apron is ordinary clothing coverage; use appropriate oven mitts and follow your appliance instructions around heat. Never use the apron hem as a substitute for a pot holder.
If two people share an apron, compare their preferences separately. One might enjoy thicker canvas while the other cares most about easy movement. Picking a neutral color will not resolve a disagreement about weight. Put the practical criteria in order first: preferred fabric feel, coverage, strap adjustment, then color. Our style comparison keeps the three AFUN constructions together so you can check that you are buying the one you intended.
| Your routine | Detail to check | Try before settling in |
|---|---|---|
| Baking and mixing | Bib coverage and reachable pockets | Lean toward the bowl without the bib falling forward. |
| Weeknight prep | Fabric feel over your usual clothes | Reach across an empty counter and turn toward a drawer. |
| Coffee and pouring | Weight and water-repellent finish | Keep the fabric and pocket contents away from the work surface. |
| Outdoor grilling | Secure ties and unrestricted movement | Check your reach with the grill cold and the pockets lightly loaded. |
Fit it in the clothes you cook in.
Try the apron over your normal cooking clothes, with the pockets empty. Place the straps over your shoulders, straighten any twists and position the bib where you want coverage. Adjust both sides gradually. Tightening one side dramatically can pull the whole panel off center and make a pocket feel awkward even when the apron body is the right size.
Once the bib sits comfortably, secure the waist ties and check their loose ends. You should be able to reach forward without the top edge pulling sharply. Bend slightly at an empty counter, turn to each side and sit down if part of your preparation happens at a table. These movements reveal more than standing still for a mirror check. Do the test before handling food or approaching a hot appliance.
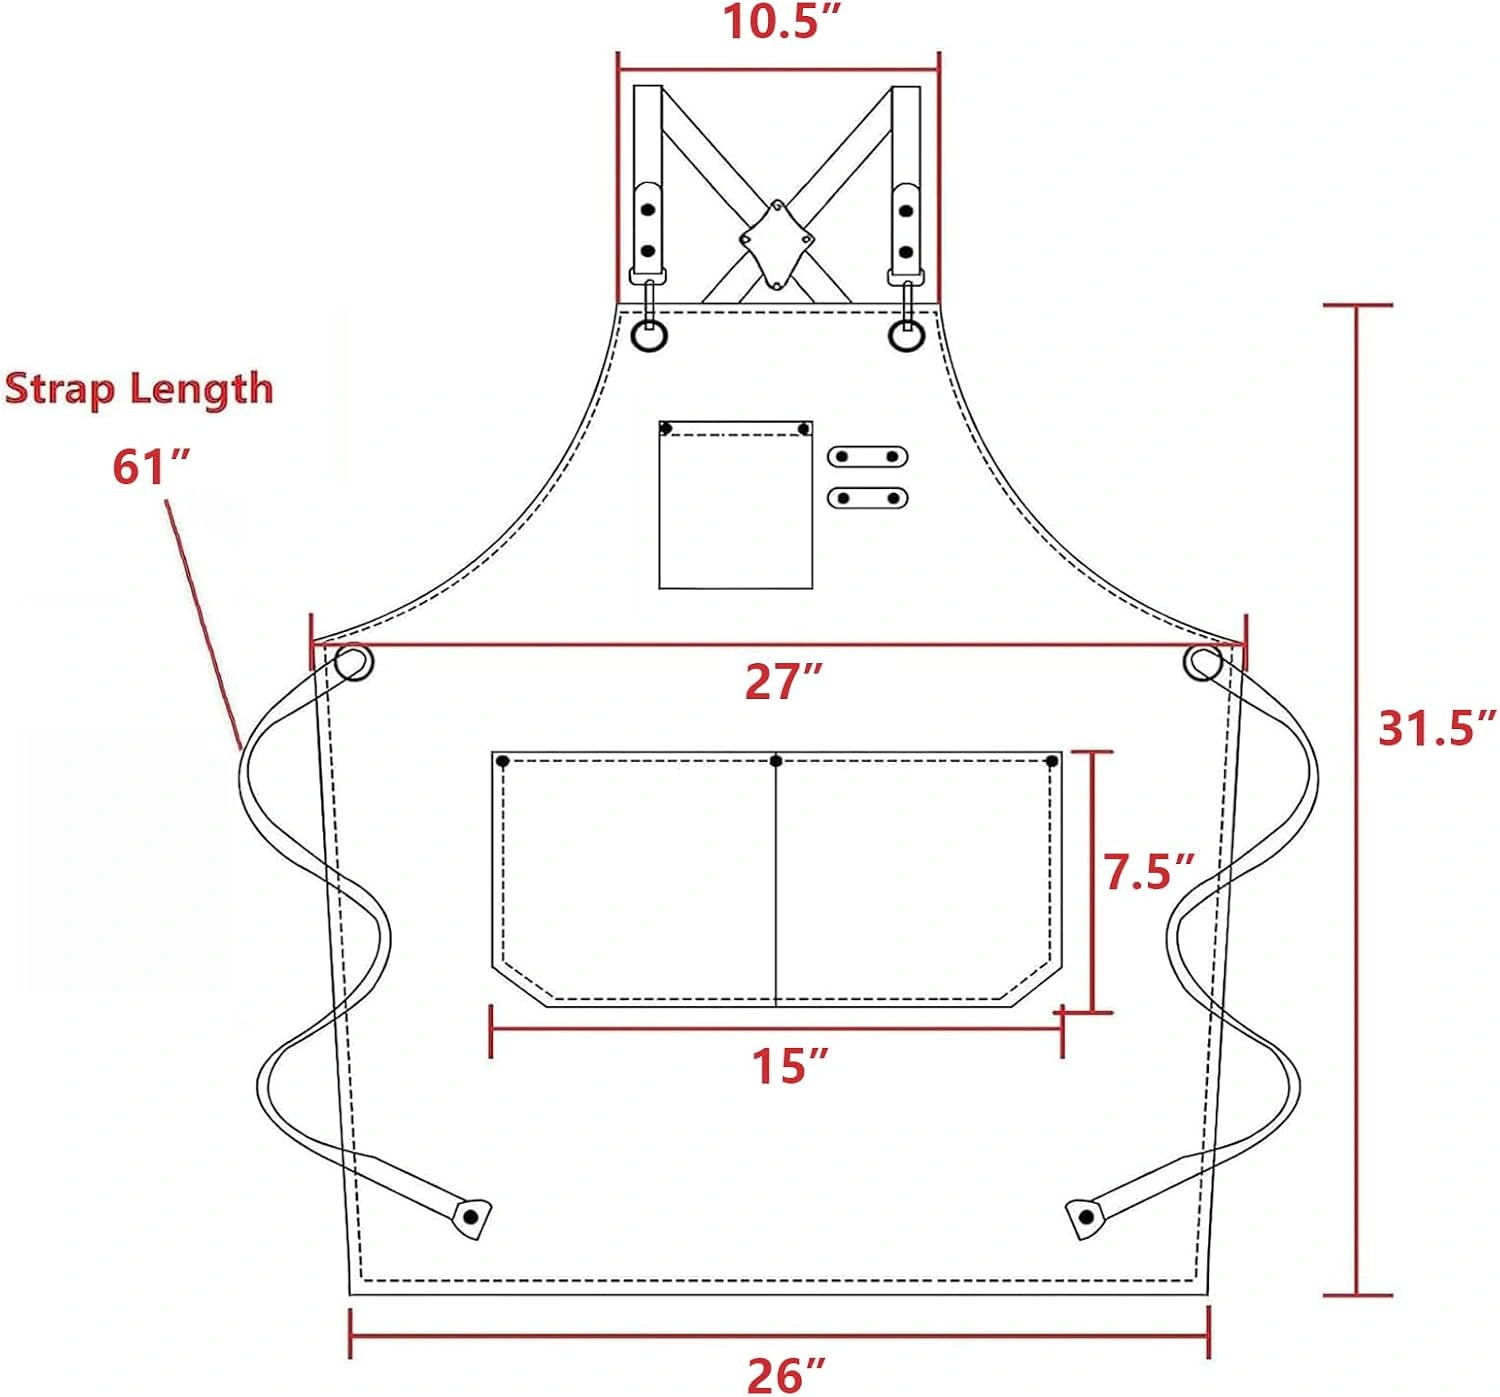
The classic and 12 oz diagrams show a 31.5-inch apron body, a 27-inch upper width and a 26-inch hem width. These are fabric dimensions. They are not waist measurements or a guarantee that the apron wraps around a particular body size. Compare the same points on an apron you already like, or use a tape measure to picture the panel against your clothes without confusing panel width with circumference.
Front tying is a preference, not a requirement. Whether the ties reach comfortably around to the front depends on your body, clothing and adjustment. Do not pull the bib too low or tighten the waist uncomfortably just to recreate a product photograph. If the straps keep slipping or the pockets sit too low, follow our cross-back fit guide and change one adjustment at a time. A repeatable setup is more useful than a complicated knot.
Give each pocket a small, clear job.
Three pockets offer enough room for a few useful objects without requiring you to carry the contents of a kitchen drawer. Start with an empty apron and choose what you repeatedly reach for. A compact timer, a short shopping note or a recipe card might earn a place. Something you use only once can usually stay on the counter. Check that each item fits securely rather than assuming a pictured accessory matches your own.
Try a simple arrangement: one lower pocket for clean paper notes, the other for a small dry item, and the chest pocket for something light that will not fall toward your work when you lean. Keep sharp tools, uncapped probes and hot utensils out of ordinary fabric pockets. Return those to an appropriate holder or work surface. The aim is easy access without adding an awkward load to the front of your body.
A phone deserves a separate decision. A bulky case changes how it fits, and a phone in an open pocket may shift when you bend. If you follow a recipe on your phone, a stable stand outside the food-preparation area may be more convenient than repeatedly retrieving it. Check the pocket with the phone you actually own, then remove it if it presses against you or protrudes too far.
Leave at least some space unused. You may need to sit, carry a bowl close to your body or open a low drawer. A full pocket can interfere with those movements. At the end of the first session, empty the pockets onto a table and notice which objects you used. Keep the useful few next time. For projects involving more small tools, our garden and studio pocket guide explains a different approach.
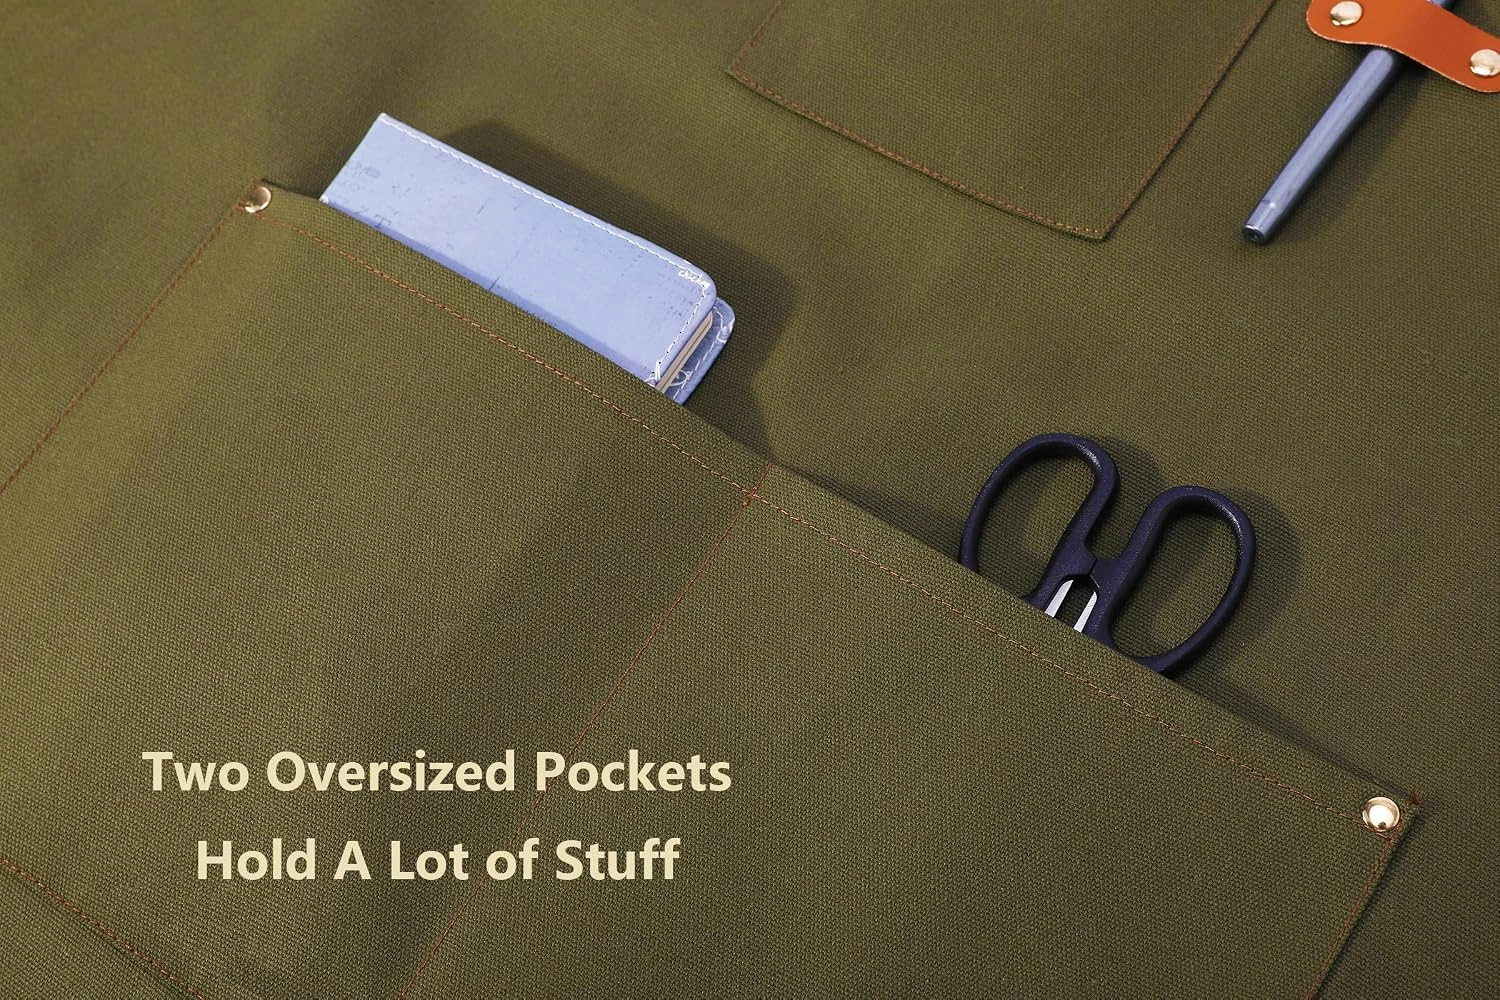
Set up the counter before you start.
An apron helps with the things you carry, but the counter still does most of the work. Read through the recipe and identify where the bowls, ingredients and finished food will go. Leave a clear area for the next step instead of filling every available surface at the beginning. If the apron pockets are becoming temporary storage for tools that do not belong there, reconsider the counter arrangement.
For baking, put recipe notes where flour-covered hands do not have to dig for them. Measure ingredients into suitable containers and decide where the empty packages will go. A small paper checklist in a pocket can help track several batches, provided you can retrieve it cleanly and easily. Large utensils and measuring cups belong at the station where they will be used, rather than hanging against the apron front.
For a short evening meal, a simpler setup may be enough. Place the chopping board, ingredients and a suitable waste container within a comfortable working area. Keep frequently opened drawers clear of dangling ties. If your kitchen has limited room, try your usual turn from counter to sink before you begin. That movement can expose a loose strap end or an overfilled pocket you did not notice in the mirror.
A shared kitchen benefits from consistent places for communal items. Agree where the timer, clean towels and serving utensils live so that they do not disappear into one person's pockets. Give each cook their own apron if that makes fit and cleaning easier. The apron should support the way you work together; it should not become the only place anyone can find the tool needed for the next step.
Carry the routine outside, not the whole kitchen.
Before grilling, prepare a stable place for utensils and serving dishes beside your cooking area. Set up while the equipment is cold so you can check your reach without working over heat. A tray can carry the ingredients and tools in one trip; it also gives them a clear home when you arrive. An apron is a poor replacement for a surface that safely holds a platter or a long-handled utensil.
Make the distinction between tools used for raw food and those used for cooked food easy to follow. The USDA's guidance on grilling emphasizes clean utensils and platters. Put the clean serving set where it can remain separate while you cook. A pocket does not turn a used utensil into a clean one, and wiping your hands on the apron does not replace washing them. Follow the full food-handling guidance when planning the meal.
“When taking food off the grill, use a clean platter.”
USDA Food Safety and Inspection Service, Grilling and Food Safety
Outside, check the ties again over whatever additional layer you are wearing. Secure loose ends and keep the fabric clear of flame and hot surfaces. Do not interpret a heavier canvas weight or a water-repellent finish as a heat-protection rating. Ordinary apron coverage has a different purpose from the protective equipment needed to handle hot cookware. Keep appropriate heat protection within reach at the station.
If you move between the kitchen and patio, think through the doorway as part of the setup. Carry one manageable load, leave a clear landing place and keep the apron pockets light enough that they do not interfere with the tray. The best arrangement is one you can repeat without remembering where you last set everything down. Adjust it after the meal, when you can see which trips were unnecessary.
Make cleanup part of the choice.
Before washing, empty every pocket and inspect the lower corners. Paper scraps, clips and forgotten small objects are easy to miss. Brush off loose dry debris as appropriate, then read the label attached to your apron. Follow that label for washing, drying and ironing. A care routine copied from another canvas product may not suit your apron, especially when straps, trim or a finish are involved.
The 12 oz line has detachable straps, but that feature does not mean every component should be washed the same way. Follow the garment's instructions about removing and cleaning them. If you detach straps, make a note or take a private reference photo of their arrangement before starting. Put the pieces together in a consistent place so the next cooking session does not begin with a search for a missing strap.
Choose color with your habits in mind. A lighter shade can make residue easier to notice; a darker shade may fit the rest of your kitchen clothing better. Neither is a reason to delay necessary cleaning. Screens and room lighting can also change how colors appear. Look through the selected product's complete gallery and choose a shade you enjoy rather than expecting any color to stay visually unchanged through use.
Keep the apron used for cooking separate from one used with soil, paint or workshop materials. Give each a place to dry and store, and avoid tossing a damp apron into a closed container. Before putting it away, check the straps and pocket stitching for visible wear. Address a loose attachment before filling the pockets again. Our fit and care page is a concise reminder; the garment label remains the guide for the actual cleaning method.
Choose for a household, a host or a gift.
When buying for someone else, start with their routine rather than your preferred color. A keen baker may value a different fabric feel from someone who mainly makes coffee. A person who already uses cross-back straps may know exactly what they like; someone accustomed to a neck loop may appreciate time to learn the new arrangement. Ask about fit and washing preferences if you can do so without spoiling the surprise.
If you have access to an apron they wear comfortably, compare its flat measurements. Do not substitute a shirt size for an apron measurement. The panel's length, pocket position and tie arrangement all influence the experience. Check the selected option and available return terms in the purchase tab before ordering a gift. Keep the garment label and packaging until the recipient has had a chance to assess the fit.
For a household buying two aprons, different colors can make ownership and adjustment easier to remember. You do not need matching weights simply because the colors coordinate. One person can choose the lighter 12 oz line while another prefers classic canvas. Look at each product's name and specifications carefully: a similar shade across two collections does not mean the aprons have the same construction.
| Before ordering | What to confirm |
|---|---|
| Fabric | The selected line is 12 oz or 16 oz, as intended. |
| Coverage | The garment dimensions suit the preferred bib height and hem position. |
| Storage | The pocket arrangement matches a few real everyday items. |
| Selected option | The color and model in the purchase tab match the product you chose. |
| Order details | The final price, delivery estimate and return terms work for your plans. |
Use the first meal to refine the setup.
On the first outing, choose a familiar recipe. A routine you already know makes it easier to notice whether a strap is twisted, the bib sits too low or a pocket item gets in the way. Start with the apron lightly loaded, and make adjustments away from food and heat. You are looking for a setup that lets you forget about the apron while still knowing where the useful small things are.
Afterward, note one thing that worked and one thing to change. Perhaps the lighter canvas suited you, but the phone belongs on a stand. Perhaps the coverage felt right, but tying at the back worked better than trying to wrap the straps around. Small, specific observations give you a better second session than changing everything at once. Repeat the movement check when the clothing underneath changes.
Ready to choose a starting point? Explore the classic canvas collection for a substantial feel, or the 12 oz collection for the lighter construction. Open a product page to examine its photographs and fit details. Once you have chosen the fabric and coverage, color can be the enjoyable final decision.